Posts

Donut day

Image
Jan and I went out this morning to do the shopping and found loads more people out than previous weekends. We celebrated by going to a cafe and actually sitting down to have a coffee and a donut. People seem to be optimistic and cheerful, and it's easy to understand why. Melbourne has been released from lockdown, and yes, we made a difference! Today was the third day of no new cases in less than a week. They're becoming known as donut days. It shows what humans can do if they work co-operatively, following sound advice from scientists and medicos and having clear rules and leadership to back it up. Because we weren't working in competition, this was something we did together. It was hard, and yes it cost a lot, both in terms of money and in terms of personal sacrifice, but looking at other countries, what's undeniable is we saved lives. We saved the lives of people we don't know, and we saved the lives of people we do know. It's just another difference between a...

Flat frames - using a calibrating technique to find dust

Image
What's that madman doing this time? A few nights ago I was out in my back yard taking photos of planets. Using a monochrome camera and filters, I got a couple of images. They're not great, but that's another story. While I was out there, I noticed a problem. Jupiter had a big dark blob in front of it. The blob was about the same size as the planet, and roughly circular. Because Jupiter was a smallish image on the sensor, I was able to move my mount so that the blob didn't interfere with the image, but I suspected I had dust on one of my filters. Next morning, I looked at the filters and the camera. Try as I might, I wasn't able to see anything. Dust is a frustrating problem, especially for planetary photographers. With photos that use the whole frame, you can compensate for dust, but for tiny planets you can't do this. I decided to find it using the camera itself, by getting a "flat frame". This is a photo of what should be a blank featureles...

Learning planetary photography - session 5 (monochrome camera with filters)

Image
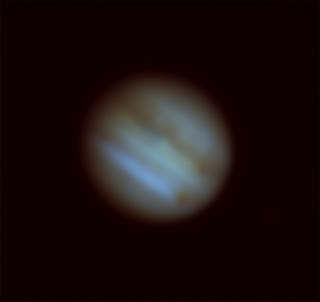
My journey into planetary photography was continuing. After four days of experimenting and making lots of mistakes, I finally got some planetary photos, but you can see I have a long way to go. I'm using similar equipment as others, and their images are fantastic. I think a reasonable goal is to get cloud patterns on Jupiter. As they say in the Scouts, plan - do - review. My previous images were blurry, so I sought advice on a couple of forums. The experts told me to try shorter exposures. It's a balance: too much exposure time and you get motion blur caused by the atmosphere, but too much gain and you get noise - speckles that ruin the image. The plan was to use a QHY5-III 178M, a mono camera with my filter wheel with red, green and blue filters. I wanted more resolution, but this adds a new challenge in processing. I was also using an extra Barlow, a saxon 2" ED high quality model. At 8128mm and f/40, the images are likely to be dim, especially as I'm ...

OSIRIS-REx and the Bennu Bounce

Image
Back in December 2018 I wrote about the encounter between the NASA's probe OSIRIS-REx and the asteroid Bennu . After a lengthy journey from Earth, the probe had settled into orbit and was about to begin studying the asteroid. Since then, we've learned a number of unexpected things. First, there's water there. Not a lot, but it looks like water is turning up all over the solar system. But there may have been a lot more water there in the past, with evidence that it may have actually flowed through Bennu's interior. Second, there's organic carbon there. Because carbon forms the backbone of all organic molecules such as sugars and alcohols, this might hold some clues to the origins of life. Third, and the most interesting thing (for me, at least), was that Bennu is a remnant from a larger asteroid that had been blasted to bits in a collision. This gave Bennu not only its odd diamond shape, but also its relatively fast spin. That would have been quite a sight. ...

Powerful Owl death stare!

Image
Some of the restrictions on Melburnians have now been relaxed. I hope we're not being too optimistic. But this morning, I found that we're allowed "outdoor photography". Close enough to birding, let's go! I was very twitchy, so I decided to go to Banyule Flats. This is the best birding in my area, mainly due to the variety of habitats found there. Banyule is on a floodplain of the Yarra, just below the confluence of the Plenty River. It has a relatively large lake, extensive reed beds (that provided a Painted Snipe a few years back), a chain of billabongs, riparian trees, open grassland and of course, the Yarra itself. It also has, famously, a couple of Powerful Owl roosts. I've seen lots of Powerful Owls before, but one more would always be good. So when I arrived I made a beeline for the spot (which I'll be vague about...). The long grass around the owl tree had been trampled in places, so I clearly wasn't the first birdo here. It always...

Lunar image - before and after sharpening with RegiStax

Image
I've been doing some planetary imaging of late, using a borrowed 8" Celestron. While I was doing that, I also took the opportunity to take a photo of the moon. I was interested in getting an image of Copernicus. Finding the Moon is relatively easy, especially when it's nearly full. Because the scope I was using had an 8" aperture, it was uncomfortably bright, so I attached a Moon filter on my eyepiece. Once I had the Moon in view and the mount tracking, I swapped the eyepiece for my camera, a QHY5-III 178M. I captured 1000 frames, saving them onto my computer as a normal movie format. Back inside, I winnowed this down to 250 frames using PIPP. Then I used AutoStakkert3 to select the best 125 frames and make a high-quality image from these. I've attached the image here, cropped a bit. Copernicus is the large crater. You can make out the central peaks as bright spots in the middle of the crater. Off to the left at the top of the photo is the large crater Rei...

The dark art of calibrating your astrophotography - light frames, dark frames, flat frames and bias frames.

Image
All my photos are bad in different ways! Astrophotographers are terrible "pixel peepers". We rarely take single photos. Deep sky people like me will take upwards of 50 images at a time, and call them "light frames", or perhaps "subframes". Planetary or lunar photographers are even worse. They'll take literally thousands. Why? If you take 50 lights, they're all the same, right? Yes, that's nine running chickens Look closer, they're all slightly different. If you look carefully, you'll see all manner of problems with each image.  In one, you might have had poor focus. In another there might have been a cloud, or atmospheric disturbance. In another a satellite or an aeroplane zipped through the frame. In yet another, your tracking was off. Arrgh! Did I waste my time? No, you didn't. We can use mathematics to get rid of most of the problems where the images are slightly different. We call it "image stacking". Part 1: stacking ...