Posts

Showing posts from October, 2020

Donut day

Image
Jan and I went out this morning to do the shopping and found loads more people out than previous weekends. We celebrated by going to a cafe and actually sitting down to have a coffee and a donut. People seem to be optimistic and cheerful, and it's easy to understand why. Melbourne has been released from lockdown, and yes, we made a difference! Today was the third day of no new cases in less than a week. They're becoming known as donut days. It shows what humans can do if they work co-operatively, following sound advice from scientists and medicos and having clear rules and leadership to back it up. Because we weren't working in competition, this was something we did together. It was hard, and yes it cost a lot, both in terms of money and in terms of personal sacrifice, but looking at other countries, what's undeniable is we saved lives. We saved the lives of people we don't know, and we saved the lives of people we do know. It's just another difference between a

Flat frames - using a calibrating technique to find dust

Image
What's that madman doing this time? A few nights ago I was out in my back yard taking photos of planets. Using a monochrome camera and filters, I got a couple of images. They're not great, but that's another story. While I was out there, I noticed a problem. Jupiter had a big dark blob in front of it. The blob was about the same size as the planet, and roughly circular. Because Jupiter was a smallish image on the sensor, I was able to move my mount so that the blob didn't interfere with the image, but I suspected I had dust on one of my filters. Next morning, I looked at the filters and the camera. Try as I might, I wasn't able to see anything. Dust is a frustrating problem, especially for planetary photographers. With photos that use the whole frame, you can compensate for dust, but for tiny planets you can't do this. I decided to find it using the camera itself, by getting a "flat frame". This is a photo of what should be a blank featureles

Learning planetary photography - session 5 (monochrome camera with filters)

Image
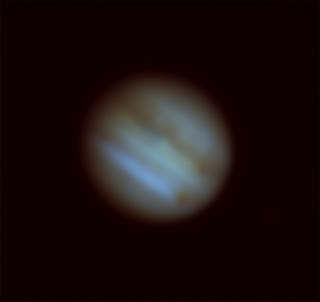
My journey into planetary photography was continuing. After four days of experimenting and making lots of mistakes, I finally got some planetary photos, but you can see I have a long way to go. I'm using similar equipment as others, and their images are fantastic. I think a reasonable goal is to get cloud patterns on Jupiter. As they say in the Scouts, plan - do - review. My previous images were blurry, so I sought advice on a couple of forums. The experts told me to try shorter exposures. It's a balance: too much exposure time and you get motion blur caused by the atmosphere, but too much gain and you get noise - speckles that ruin the image. The plan was to use a QHY5-III 178M, a mono camera with my filter wheel with red, green and blue filters. I wanted more resolution, but this adds a new challenge in processing. I was also using an extra Barlow, a saxon 2" ED high quality model. At 8128mm and f/40, the images are likely to be dim, especially as I'm

OSIRIS-REx and the Bennu Bounce

Image
Back in December 2018 I wrote about the encounter between the NASA's probe OSIRIS-REx and the asteroid Bennu . After a lengthy journey from Earth, the probe had settled into orbit and was about to begin studying the asteroid. Since then, we've learned a number of unexpected things. First, there's water there. Not a lot, but it looks like water is turning up all over the solar system. But there may have been a lot more water there in the past, with evidence that it may have actually flowed through Bennu's interior. Second, there's organic carbon there. Because carbon forms the backbone of all organic molecules such as sugars and alcohols, this might hold some clues to the origins of life. Third, and the most interesting thing (for me, at least), was that Bennu is a remnant from a larger asteroid that had been blasted to bits in a collision. This gave Bennu not only its odd diamond shape, but also its relatively fast spin. That would have been quite a sight.

Powerful Owl death stare!

Image
Some of the restrictions on Melburnians have now been relaxed. I hope we're not being too optimistic. But this morning, I found that we're allowed "outdoor photography". Close enough to birding, let's go! I was very twitchy, so I decided to go to Banyule Flats. This is the best birding in my area, mainly due to the variety of habitats found there. Banyule is on a floodplain of the Yarra, just below the confluence of the Plenty River. It has a relatively large lake, extensive reed beds (that provided a Painted Snipe a few years back), a chain of billabongs, riparian trees, open grassland and of course, the Yarra itself. It also has, famously, a couple of Powerful Owl roosts. I've seen lots of Powerful Owls before, but one more would always be good. So when I arrived I made a beeline for the spot (which I'll be vague about...). The long grass around the owl tree had been trampled in places, so I clearly wasn't the first birdo here. It always

Lunar image - before and after sharpening with RegiStax

Image
I've been doing some planetary imaging of late, using a borrowed 8" Celestron. While I was doing that, I also took the opportunity to take a photo of the moon. I was interested in getting an image of Copernicus. Finding the Moon is relatively easy, especially when it's nearly full. Because the scope I was using had an 8" aperture, it was uncomfortably bright, so I attached a Moon filter on my eyepiece. Once I had the Moon in view and the mount tracking, I swapped the eyepiece for my camera, a QHY5-III 178M. I captured 1000 frames, saving them onto my computer as a normal movie format. Back inside, I winnowed this down to 250 frames using PIPP. Then I used AutoStakkert3 to select the best 125 frames and make a high-quality image from these. I've attached the image here, cropped a bit. Copernicus is the large crater. You can make out the central peaks as bright spots in the middle of the crater. Off to the left at the top of the photo is the large crater Rei

The dark art of calibrating your astrophotography - light frames, dark frames, flat frames and bias frames.

Image
All my photos are bad in different ways! Astrophotographers are terrible "pixel peepers". We rarely take single photos. Deep sky people like me will take upwards of 50 images at a time, and call them "light frames", or perhaps "subframes". Planetary or lunar photographers are even worse. They'll take literally thousands. Why? If you take 50 lights, they're all the same, right? Yes, that's nine running chickens Look closer, they're all slightly different. If you look carefully, you'll see all manner of problems with each image.  In one, you might have had poor focus. In another there might have been a cloud, or atmospheric disturbance. In another a satellite or an aeroplane zipped through the frame. In yet another, your tracking was off. Arrgh! Did I waste my time? No, you didn't. We can use mathematics to get rid of most of the problems where the images are slightly different. We call it "image stacking". Part 1: stacking

Learning planetary photography - session 4 (at night!)

Image
I'm continuing to learn about planetary photography. I'm a beginner here too, so you can do this! Last time, I showed the first few days of work with a couple of our new QHY cameras. I'm totally new to this, and spent the first few sessions just taking test shots during the day. By my fourth day, I thought I'd take it out at night. I had a 8" Celestron SCT on my NEQ6 mount, and a Barlow for a focal length of 4064mm.  Behind that, I had a QHY5-III 178C. This is a colour camera, with very small pixels - they're 2.4µm. This means that while they're not very sensitive, they're packed in tightly so you can get the most pixels on the planet. I was using the "lucky imaging" technique, where you take as many images as you can, and sift through them, selecting and integrating the best ones. The atmosphere is a chaotic place and randomly forms lenses of different temperature air. Some of the short photos should be able to fluke good views - I hoped.

The tortured flight of Explorer 1

Image
For something a little different (we're still in lockdown in Melbourne and I can't get out to a dark sky site), here's a story about spin stabilisation and how it doesn't always work. This is when an object spins while in free-fall, rather than tumbling. Tumbling, as the name suggests, is when the object spins in more than one axis. During the Second World War, bomb makers had realised that bombs that tumbled through the atmosphere on their way to their targets did not detonate reliably. In the same way, artillery shells wandered off their targets when they tumbled. Making these missiles spin through their flight stopped them from tumbling. Shells could be spun by rifling in gun barrels, and bombs had fins that caused their spin, as well as pointing them towards the ground. So in 1958, when the US launched their first satellite, Explorer 1, engineers decided to stabilise the final stage by spinning it along its long axis. Unlike Sputnik 1, Explorer 1 had a "rock

Starman and the Tesla

Image
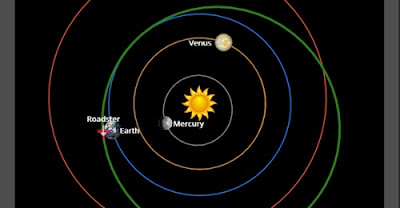
As a brief follow-up from my post the other day about the possible return of the second -stage booster from the 1966 Surveyor 2 mission to the Moon, I noticed that Starman is about to fly past Mars. Remember back in March 2017, when engineers at Elon Musk's SpaceX were looking for a dead weight to test their Falcon Heavy launch vehicle? They used Musk's own Tesla Roadster, sending it on a largely unplanned mission to (or beyond) Mars. The range it had was not accurately known. Typical for Musk, the theatre of the mission was considerable. References to Douglas Adams' Hitchhiker's Guide "trilogy in five parts" were everywhere, and Isaac Asimov also rated a mention. Yes, of course it was a publicity stunt, although it did have some scientific legitimacy. To cut a long story short, the mission was an outstanding success. The Falcon's upper stage (together with the Tesla) escaped Earth's orbit - just like the Centaur booster in 1966 - and transferred

Learning planetary photography - first three sessions

Image
I'm going to prove that you can do this, by showing my own learning curve. I want to show what the owner of a new planetary camera should reasonably expect, and show how you can expect to improve and what you should be aiming for. At the shop, we'd just got in some QHY cameras, and I needed to know a bit more about them so I could support our clients. I'm an experienced nebula photographer, but I'd never done any serious planetary work before. So while I was familiar with the software and some of the processes, I was, in effect, a total beginner. When getting new equipment, everyone faces a learning curve, novices and old hands alike. If I can show you my own progress with planetary imaging, I hope you'll find it less intimidating. I've tried three cameras so far, the QHY5-III 462C, the QHY5-III 178C and the QHY5-III 178M. They're all similar, being relatively inexpensive uncooled planetary cameras with small sensors and high frame rates. I've varied

Surveyor 2 - the ghost rocket

Image
Surveyor 2 - ghost rocket or space junk? In September 1966, the US launched a rocket carrying a Moon probe known as Surveyor 2. The mission was to land on the Moon and transmit data back to Earth. So-called "soft landings" had been done twice before, once by the USSR and once by the US. The cold-war space race was on. The plan was that the probe photograph its own landing site. To do this, it would land, pause, then fire its engine and take off again, landing a second time. During this brief "bounce", the probe would examine the ground where it had landed. Nothing was known about the Moon's surface. If humans were to walk there, it was important to know that they wouldn't fall into a subsurface cavern or be lost in quicksand. The probe was going to use photographs and radar to examine the structural integrity of the surface. But it was all a moot point. The Centaur booster successfully lifted the probe out of Earth orbit and towards the Moon before sepa